Thursday, May 27, 2010

SLEEPY HALLOWeen PARTY

Here's another idea for a theme party.

Stark white pumpkins and black table linens. Add some bare branches, (sprayed black, of course) in vases and standing in corners..... some fancy costumes and a sit down dinner served by a ghoulish butler.

Don't forget the mulled cider, and dripping candles in your candelabra to complete your Sleepy Hollow Dinner Party.

Followed by a seance at midnight.......

Wednesday, May 26, 2010

THEY'RE SO CUTE AND CREEPY.... I HAVE TO HAVE THEM!

Living Dead Dolls
Series 17 Urban Legends:

We all know them, things that happened to a friend of a friend, stories everyone swears are true. They are, Urban Legends. Now, for the first time, the Living Dead Dolls immortalize five of the most infamous legends:

THE HOOK- Parked on a dark road, a bulletin comes over the radio that a criminally insane patient has escaped the asylum. What is that scratching on the car door? Could it be the escaped lunatic? He comes complete with removable hook.

THE VANISHING HITCHHIKER- He found her alone on a desolate road on a dark night, he offered a ride. The next day, he remembers he left his jacket with her. He returns to retrieve it only to find, did she really exist in the first place? Complete with letterman jacket.

THE UNWILLING DONOR- Waking up dazed and in a bathtub filled with ice, what's that crudely stitched up wound on her side and note by the phone? She has become THE UNWILLING DONOR, complete with kidney.

SPIDER BITE- Returning home from a tropical getaway, she noticed a small bump on her cheek. Thinking it is just a pimple she continues to apply cream, until one day...

BLOODY MARY- Only the brave or foolish would dare to stand in front of a mirror in a darkened room and call her name thirteen times. Once summoned, her price must be paid...in blood! She comes complete with mirror accessory. Some legends aren't born, they're dug up. Each doll comes packaged in their own coffin complete with urban legend. 
I have to have them!

To find these creepy cuties, check at your favorite comic/toy store to see if they carry them!

Tuesday, May 25, 2010

RANDOM ACTS OF CREEPINESS

Everyone comments on the "strange" things that I've got around the Manor...but I'm not sure I think it's strange.

I try to see something unique and beautiful in everything I use to decorate the house. It's not really that weird, is it?

Maybe a few branches, bugs and ravens might not appeal to everyone, but it's not like we live in the Munster's house......
Oh! Could you imagine how fun that would be?!


Monday, May 24, 2010

EYE CANDY

How pretty and fun!

I love the bright candy colors of these beads on this bracelet. I think it's pretty enough to wear everyday, if you want.

You know, it would make everyone wonder what you were up to.

Check  out their website!

Sunday, May 23, 2010

HAPPY SUNDAY

I've been a bit under the weather this week. But the hubby is taking good care of me. So it's been a weekend of reading in bed and watching "Ghost Stories" on the Travel Channel, while napping with Jack.

Life is good.

Saturday, May 22, 2010

A COUCH TO DIE FOR

A friend of mine just sent me this picture, because she thought it would be "perfect" in our house for the annual Halloween bash! I think it's cool enough to keep around all year long.

I can't seem to find it's creator anywhere on line. But I might be able to talk the hubby into helping me make a proto-type. After all, he did wonders with our coffin-beer-cooler, and my casket bookshelf.

If anyone finds the manufacturer's website where I direct fellow Halloweenies to, be sure to e-mail me, so I can post it!

Friday, May 21, 2010

BOTTLE-BLOBS

I've gotten a few e-mails about some ideas for kids projects.
Here's a good one. What child wouldn’t love to create one of these fun ooey gooey Blobs in a Bottle? I found this creepy craft in the Halloween craft book called, Make Yourself a Monster by Kathy Ross. There’s tons of fun monsterish ideas, perfect for Halloween!

SUPPLIES:
~corn syrup empty clear bottle/jars – with or without a lid
~green food coloring
~crafting googly eyes
DIRECTIONS:
Pour corn syrup into your jar. Add 2-3 drops of food coloring. Now add your googley eyes. These will float, unless you glue on a weight to the back of the eyes, or something heavy. Now your Blob is ready for display.

Keep these ghoulish eyes on hand, you may have a monster visit with only one eye that might need a spare!

Thursday, May 20, 2010

SCARY CHRISTMAS!

Forget Team Edward and Team Jacob! 
According to movie execs, director Tim Burton and film star Johnny Depp are making a feature film version of the classic 1960's gothic TV soap opera Dark Shadows, and producer Graham King now confirms that the film will shoot in the fall, with Depp to play broody vampire Barnabas Collins.
"We're actually going to shoot that film early September with Tim Burton and Johnny," King said in a group interview Friday in Los Angeles.

Burton finished Alice in Wonderland, which also stars Depp which opened March 5th. King is already prepping production on Dark Shadows with screenwriters so that it is ready for Burton to shoot this fall.

"We've been working on the script a lot, even when he was working on Alice," King continued. "We've been given a script. John August wrote the first screenplay. We're making some changes, but the film's going to be in production, as I say, September of this year. We were hoping for a Christmas release date, who knows."

Dark Shadows was a daytime soap opera on ABC from 1966 to 1971 featuring Jonathan Frid as Collins. NBC tried a weekly prime-time series reboot in 1991. The original was famous for its gothic tone and setting. Oh! I can hardly wait!

Wednesday, May 19, 2010

QUICK COSTUME IDEAS

Ok....we've all been there. We've got a Halloween party to go to, and never gave the costume a second thought. Now, everyone wants to know what your costume is gonna be. Uh-oh.

Believe it or not, with our favorite day of the year still several months away.... recently, I've been getting lots of e-mails about homemade Halloween costumes. It seems that a lot of us out there aren't real fans of the store bought costumes. And not everyone wants to be a sexy maid or devil, am I right? Or maybe you don't have a lot of spare time to sew or craft a Martha Stewart-worthy costume.

Remember when making your own costume was fun? After all...we just want to get a few oohs and aahhs when we walk in to the party.

Ok, so I'm gonna help you out. Here are my "Top 10 To-The-Rescue Costume Ideas":

Hit by Lightning
Just wear jeans and a sweatshirt. Make a with large yellow felt zigzag pinned or sewn to the back, blackened zigzag tears here and there, hair gelled to stand straight up, black burnt marks on cheeks.
Another idea: Be a “Jogger Hit By Lightning” by wearing a sweat suit or running shorts instead of jeans.

Fairy Godfather
You can buy cheap fairy wings and a wand and that’s all! Ok guys, just wear a pair of jeans, a black or white tee shirt and a baseball cap. Put on the wings and carry a cigar, and put your magic wand in your back pocket! I have to admit, the hubby has used this costume a few times, and it was a hit!

Bag of Trash
This is one of the "fastest" costumes you can make in no time...and be out the door to the party. Make two leg holes is a large sized trash bag. Then step into the bag, then add balls of crumpled newspaper to hold a round shape. Make two armholes in each side and secure around the neck.

Tourist
Just dig in the closet for a few things. A Hawaiian shirt or other loud clothes, camera, hat with pins all over it, maps sticking out of pockets, sunglasses. Easy. Good as a couples costume, too.

Titanic Survivor or Passenger
Pin plastic seaweed and fake aquarium plants to your clothes and wear long strands in your hair. Shred the arms and pockets of an old shirt, overlay with a shredded vest and wear over tattered trousers or a long skirt with a torn hem. Wet look fabric is a bonus. Make a long necklace or belt from a thick length of hemp rope; unravel the rope ends for best effect, and attach a toy sailboat. Hot glue polished pennies or fake gold coins (bags of gold chocolate coins are great) in strategic places. A fake fish or two sticking out of a pocket completes the ensemble.
To be a Titanic Passenger: Wear the costume described above, but add ghost or skeleton face makeup.

Miss. America
Finally! A use for those brides maids dresses! Use a old bridesmaid or formal dress, add a pair of gloves, a tiara, some over sized jewelry, and heels. For the banner, use a piece of wide ribbon, and write "Miss. America" in glitter with glue.

A Spy
For this quick Halloween costume, wear a trench coat, dark glasses and a hat pulled down over your eyes. Carry a small camera and pretend to take pictures surreptitiously. How fun and you’ll get lots of great party pictures!
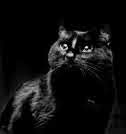
The Birds
This one you might need to be a bit crafty....but not too much. Just go to your favorite thrift store, get a jacket and skirt. Then head over to the craft store and buy a few black birds. Attach the birds to the outfit with hot glue and a glue gun (or sew them on for added strength) Put on some torn nylons and a pair of pumps. Add a bird to your hair with some bobby pins and put some fake blood on your cheek, your knee and splash some on your suit! If you add a blond wig.....you could be Melanie from “The Birds”!

Pizza Delivery Driver
Wear a matching color hat and tee shirt and carry a pizza box. So easy, it’s not even funny..... If you have time, make a pizza logo out of felt for your hat and shirt, and attach with fabric glue.

Butcher
All you need for this is a few props you probably have around the house. Wear a white tee shirt and jeans, get a white apron, and splash some red paint on the apron. Carry a meat cleaver (be sure to tape off the blade with gray duct tape.... to be safe) and maybe a string of sausages around your neck. (But don’t be out too late, you might start to get smelly!)

Now that you can breathe a sigh of relief, make yourself a cup of tea and relax... we got this covered!

Tuesday, May 18, 2010

BRAIN FOOD

You know, sometimes you just have to take time to relax and enjoy some down time. Maybe go for a walk, watch a movie, or pick up a book, and read one of the classics. I decided to go to one of my favorite places, "Half Price Books" (and yes, it is as fantastic as it sounds!) yesterday....and I found some really interesting books.

There's a new series of books, published by Quirk Classics, that blends the work of classic literary masters with new scenes of horrific creatures and gruesome action!

I picked up the most recent, "Pride and Prejudice and Zombies: Dawn of the Dreadfuls", and I can't put it down! If you like the classics, and love horror and zombies too, this is the book to read.

Also, I'm a huge Edge Allen Poe fan, (and who isn't?) and I got a copy of  "On a Raven's Wing: New Tales in Honor of Edgar Allan Poe" by Mary Higgins Clark, Thomas H. Cook, James W. Hall, Rupert Holmes, S. J. Rozan, Don Winslow, and Fourteen Others.

So, when I need a break from conjuring recipes and working long days in the workshop, this is a great way to relax.

Monday, May 17, 2010

DIRTY FUN

This is one of my latest projects, and I love it because you get messy and can be very creative (you can feel like a sculptor.....when you're really not!) at the same time. I really like this Marblex Clay. And I've been making some really cool stuff, like fancy potion bottles.

It not as difficult as it looks. Just take a wine bottle (If you're like me, you have lots of these around the house) and start adding a few clumps of the clay over the bottle, smoothing it out as you go. Be sure to make it thicker in some spots to give it a wavy texture. I found that keeping a bowl of water handy and dipping each piece (about the size of a golf ball) in the water, just enough to work with it, really makes a difference if you're attaching the clay to another surface.

Go over the entire bottle two or three times to give it the desired effect you're after. To make the bottle stopper, just take a piece of clay, roll it into a ball with your palm, and mold it into an oval shape. Place it on top of the bottle. Use the same technique to make the label, just press it flat, and use a tooth pick to carve the name into the clay. Then wet the back of the label and place it where you want it on the bottle.

Be sure to let it dry thoroughly. You'll notice some cracking in spots, but that's what you want it to do. This is where you'll start painting it. I took two medium paint brushes, and dabbed alternating red and black glossy acrylic craft paint. (Do about a half dollar size area at a time) I went over the entire bottle several times, until I got it the color and pattern that I wanted.

Then once you're happy with the color, and it's completely dried, (I let it set for 24 hours) then I sprayed it with several coats (let dry about an hour in between coats) of clear sealer. Again, let it dry for 24 hours. Look how crafty you are!

Saturday, May 15, 2010

IT'S BLOODY MARY TIME

What's a Halloween costume party without blood for special affects? Fake blood is available in novelty and party supply stores but making it yourself is fun -- and you'll see more realistic results. Mix up a batch before a party and keep the local vampires in good supply.

Here are some recipes for you to make your own realistic-looking fake blood. Real blood is reddish brown so you may need to alter the amounts of ingredients for the desired affect. Keep in mind, fake blood is messy and some of these recipes may leave stains -- so use with caution and allow plenty of time for drying.

Homemade Fake Blood:
1 c. Karo Syrup
1 Tbsp Water
2 Tbsp Red Food Coloring
1 tsp Yellow Food Coloring

Mix together in a mixing bowl and you're done. Try adding blue or yellow for a different shade.

Simple Fake Blood:
Clear Corn Syrup
Red Food Coloring
Milk - Optional

However much fake blood is how much corn syrup you'll need. Pour it into a bowl and mix in some red food coloring. Add some blue if you like. Adding a small amount of milk will make the blood appear darker and thicker.

Realistic Recipe:
2/3 c. Corn Syrup
1/3 c. Warm Water
5 Tbsp Corn Starch
4 tsp red food coloring
1 Tbsp Powdered Cocoa
2 drops of green or yellow food coloring

Mix the corn starch with the water in a large mixing bowl. Stir in the corn syrup. Add the food coloring slowly, checking for color.

Cheap 'N' Easy Blood:
~Plain Flour
~Water
~Red Food Coloring
~1 tsp. of Coffee

Boil the water on the stove, then sieve in the flour, making sure you get ALL of the lumps out. The quantity of ingredients aren't important, it just depends on how much you want. Once you have the flour mixed nicely into the water it should look nice and thick. Next, add the red food coloring.
You will notice that it's a ghastly, bright red colour but don't worry this is why we add the coffee. It is important that when you add the coffee to make sure the mixture is hot, otherwise it wont dissolve, but up until adding the coffee can be done in a ordinary mixing jug or pan.

Palmolive Imitation Blood:
You can also make fake blood with Palmolive dish soap, (it doesn't matter how much you put in) it depends on how much blood you want! Add red berry powdered Kool-Aid! This is great for prop projects, but be aware, IT WILL STAIN!

Friday, May 14, 2010

MEOW

I've had this pattern that I found in Women's Day for a few years, and I love how it looks. I've even made smaller pillows in round shapes, and they look just as cute!


Materials:
~Hand sewing needles
~Black thread
~ 1/2-inch black or pink button
~Black pillow (about 12 inches across in any fabric as desired)
~Two 1/2-inch crystal buttons
~White embroidery floss

Directions:
1. Thread a long needle with black thread; sew the 1/2-inch button to the center of the pillow, stitching all the way through and pulling the thread tight, forming the cat's nose.

2. Sew crystal buttons above nose to make eyes.

3. Thread an embroidery needle with 2 strands of floss.

4. To make whiskers, make a small stitch on one side of nose; tie thread ends together and trim to about 2 inches long.

5. Make several more whiskers on each side of nose in this way.

Thursday, May 13, 2010

DINNER IS SERVED

If you're not the kind of hostess who wants your party guests to shriek and be grossed out.... maybe you've got more class than that, and you're looking for a pretty and sophisticated look for your dinner party. Well who says that Halloween can't be pretty? Check out some of these pretty table settings for a truly elegant affair. Drop the kids off at the neighbor's fright fest and enjoy an evening for grown-ups only!

Wednesday, May 12, 2010

WEDDED BLISS

Being that today is our 4th wedding anniversary, I thought it would be appropriate to feature some Halloween-themed wedding ideas. I think if you don't want to go that route for your nuptials, it  would make a great Halloween theme party!


Tuesday, May 11, 2010

THEY'RE CREEPY AND THEY'RE KOOKY

This is one of my latest projects. I'm not much of a gardener, but I try. This is one of my favorite plants, that I've since named "Cleopatra" in honor of Morticia Addams. It's actually a crocodile plant, and it's pretty unique, the leaves grow little seedlings around the edges, that look like tiny teeth. It got the name because it looks like the mouth of a crocodile. Everyone thinks it's kinda creepy looking, I think it's pretty. Go figure.

In case you weren't an "Addams Family" aficionado.....Cleopatra was an African strangler plant whose main diet was chunks of red, fleshy meat (Cleo's favorite food was Zebra Burgers and Yak meatballs). Morticia grew Cleopatra from a seed.

The overly aggressive plant was always snuggling up to the family's visitors who didn't realize the plant's apparent affection was really Cleopatra's way of sizing up her next meal.

Monday, May 10, 2010

PUMPKIN FUN

I just love pumpkins! But what I really love is how creative some people have become with their pumpkin decorations over the years! When the kids were little, we used to paint the pumpkins and decorate them, until they were old enough to use the tools to cut them out. There sure are some pretty creative decorating options instead of just carving them, and every year they just seem to get better and better!


WHAT A GREAT WEEKEND!

I hope all the moms, moms-to-be and kids had a nice Mother's day weekend! I know I sure did. We went to visit the in-laws at the beach (we also go at the same time every year for our wedding anniversary) and it was fantastic! I also got this really cool Pandora bracelet from Ranger and Jack for Mom's day. I think the hubby helped a little bit....

I looooove my new Pandora bracelet! As you can see (hopefully) my new bracelet has the jack o'lantern, ghost and snake charms. How cool is this? And there are so many more charms that I'd like to add to my bracelet. I'm thinking maybe some orange and black beads would pretty cool.
Check out the Pandora website!

Friday, May 7, 2010

THE PUMPKIN BIRD CAGE

As you all know, I'll be the first one to admit when I copy an idea from Martha Stewart, and here's another one! I know hers are prettier than mine, but I like to put my macabre twist on some of those ideas. This is a neat alternative to carving a regular pumpkin, and sooooo simple to make.

Just hollow out your pumpkin, then draw on a simple window design with a black sharpie. Then carefully cut it out with an exacto knife. You can use an ice pick to make the hole for the lock. (Add a black tassel to an old key to make it look creepy)

Then to add some finishing touches, make a pencil outline around the window for detail, and use the ice pick again to go over the outline. You can make the window design as plain or as fancy as you like. You can even spray a lite coat of glossy black, white or even gold spray paint over the pumpkin, to give it a finished look.

This vulture is a wooden cut-out, that's been painted with black acrylic gloss paint. (I'll have some really fun templates that you can copy, coming up soon!)

To keep the pumpkin lit, you can make a cut-out in the back for a light, or use a votive candle to make it look really creepy....

Thursday, May 6, 2010

IT'S THE HAPPIEST PLACE ON EARTH

Well....at least to me it is! I'm sure you've guessed it....but I've been a huge fan of Disney World's Haunted Mansion since I was a little kid.

We spent a lot of time in Florida, and I would bug my parents for days on end until I would get to go to the Haunted Mansion. (Hard to believe that I was such an annoying child, wasn't it?)

In case you haven't been there in a long tine, or you've never been....here's a bit of history about the "hauntingest" place on earth.

And by the way...here's a bit of trivia. Did you know that in the famous dining room of the mansion, there is a place setting of dishes that are arranged in the shape of the famous Mickey Mouse ears! Betcha' didn't know that, did ya?

The attraction's roots date back to even before Disneyland was built, when Walt Disney had just hired the first of his "Imagineers". The first known illustration of the park showed a main street setting, green fields, western village, and a carnival. Disney Legend Harper Goff developed a black and white sketch of a crooked street leading away from main street by a peaceful church and graveyard, with a run-down manor perched high on a hill that towered over main street.

While not part of the original attractions when Disneyland opened in 1955, Disney assigned Imagineer Ken Anderson to make a story around the Harper Goff idea, and design of his new 'grim grinning' adventure. Plans were made to build a New Orleans themed land in the small transition area between Frontierland and Adventureland. Weeks later New Orleans Square appeared on the souvenir map and promised a thieves' market, a pirate wax museum, and a haunted house walk-through. After being assigned his project, Anderson studied New Orleans and old plantations to come up with a drawing of an antebellum manor overgrown with weeds, dead trees, swarms of bats, and boarded doors and windows topped by a screeching cat as a weathervane.

Despite praise from other Imagineers, Disney did not like the idea of a run-down attraction in his pristine park, hence his well known saying, "We'll take care of the outside and let the ghosts take care of the inside."  Ken came up with stories for the mansion including tales of a ghostly sea captain who killed his nosy bride and then hanged himself, a mansion home to an unfortunate family, and a ghostly wedding party with previous Disney villains and spooks like Captain Hook, Lonesome Ghosts, and the headless horseman.

So, the decision was made to place it in the New Orleans Square section of the park, and thus the attraction was themed as a haunted antebellum mansion. In 1961, handbills announcing a 1963 opening of the Haunted Mansion were given out at Disneyland's main entrance. Construction began a year later, and the exterior was completed in 1963. The attraction was previewed in a 1965 episode of Walt Disney's Wonderful World of Color, but the attraction itself would not open until 1969. The six-year delay owed heavily to Disney's involvement in the New York World's Fair in 1964–1965 and to an attraction redesign after Walt's death in 1966.

Many Imagineers contributed ideas after the fair and showed Walt some designs for their version showing bizarre things like coffin clocks, candle men, talking chairs, man eating plants, tiki like busts, living gypsy wagons, and a faced mirror. Walt liked this and wanted to make the proclaimed "Museum of the Weird" a restaurant side to the now named Haunted Mansion, similar to the Blue Bayou at Pirates of the Caribbean. Although the idea died off, most of it lived on in the final attraction.

Two of the mansion's main designers, were in a constant argument over whether the ride should be scary or funny. One, who had a life of a background artist, made moody surroundings like endless hallways, corridors of doors, and characterless environments, wanted to make a scary adventure. the other, who designed most of the characters and zany spooks, thought that the ride should be classic Disney, silly and full of gags. In the end both got their way when they put all the scenes together.

After Disney's death in December 1966, the project evolved significantly. The Museum of the Weird restaurant idea was abandoned, and the walkthrough idea was replaced by the Omnimover system used in Adventure Thru Inner Space, renamed the Doom Buggy, a promising solution to the problem of capacity. Imagineers had been fighting the low-capacity nature of a walkthrough attraction for years, even going so far as suggesting building two identical attractions to get double the number of guests through.

On August 12, 1969, the Disneyland version of the attraction was officially opened to guests, though there were Cast Member (employee) previews on August 7 and 8, 1969, the attraction officially opened at Midnight on August 12th. The opening brought in record crowds and helped Disney recover from Walt's untimely death.

Click here to visit the Haunted Mansion!

Wednesday, May 5, 2010

MORTICIA ADDAMS, STYLE ICON

Think about it, she's gorgeous, she's got a great house, a great outfit, a butler....and a husband who adores her! You could say that Morticia was really the one who started it for me with my Halloween obsession.

One of my fondest memories was when I was in the 3rd grade and my mom made me the Morticia Addams dress for Halloween. I remember being so proud to wear it to school for our class Halloween party!

The Addams Family is a group of fictional characters created by American cartoonist Charles Addams.

The Addamses are a satirical inversion of the ideal American family; an eccentric, wealthy clan who delight in the macabre and are unaware that people find them bizarre or frightening. They originally appeared as a series of single panel cartoons, published in The New Yorker between 1938 and Addams' 1988 death.

They have since been adapted to other media, including television series, films, video games, and now a play on Broadway, starring Bebe Neuwirth and Nathan Lane! Click here to see a preview of The Addams Family, A New Musical!

Tuesday, May 4, 2010

SOME PRETTY CREEPY INSPIRATION

Things sure have been pretty busy here around the Manor. But if you search the web, you can find all kinds of inspiration for Halloween decorating. Everything from creepy and goulish...to even pretty. And most of it is pretty simple to do. Here's a little bit of inspiration that I like  to call "pretty-creepy". I think it's both pretty and creepy.

I WONDER.....

I got this as a gift from my in-laws.
Huuuummmm..... I wonder what that means? I still think she's pretty cute, though. So is it cute or creepy?

Come on.... you know, there's a little witch in every woman!